原创作品,转载时请务必以超链接形式标明文章原始出处,否则将追究法律责任。
上一节我们讲了图书管理系统的登录,相信大家对jade模板和angular js也有了了解,今天的话我们来看一下图书信息录入。在这里我们准备使用Nosql数据库,本篇博客中使用的是MongoDB。OK。Mongo DB的安装我就不多说了,那么Node.Js平台使用mongoDB我们使用什么扩展包好呢,我觉得还是mongoose比较合适,封装了好多针对mongodb的方法,简单易用。
首先我们来看一下图书model的设计bookInfo.js。
var mongoose = require('mongoose');
var Schema = mongoose.Schema;

var bookSchema = new Schema({
    _id: Schema.Types.ObjectId,
    Title: { type: String, index: true, required: true },
    ISBN: { type: String, required: true , unique: true },
    Author: { type: String },
    Price: { type: Number, min: 0.1, max: 99999 },
    Press: { type: String, required: true },
    PressDate: { type: Date, default: Date.now },
    Description: { type: String, required: true },
    Image: { type: Schema.ObjectId }
}, {
    strict: true,
    toObject: {
        virtuals: true
    },
    toJSON: {
        virtuals: true
    }
});

bookSchema.virtual('bookFullName').get(function () {
    return this.title + '(' + (this.author? this.author:'') + ')';
});

bookSchema.methods.saveBookInfo = function (callback) {
    this._id = new mongoose.Types.ObjectId;
    this.save(callback);
}

bookSchema.set('collection', 'books');
var bookModel = mongoose.model("books", bookSchema);
exports.bookModel = bookModel;
首先在代码中我们看到引用了mongoose扩展包,在VS中我们可以这样引用扩展包。

点击Install New npm Packages

搜索mongoose,找到后点击Install Package或者你用命令行安装也行。
OK,此时我们require('mongoose')加载mongoose模块。接着我们定义了一个bookSchema,定义了一些字段,type是它的类型,index是否支持索引,required是否可以为空,类似于sqlserver的is not null,unique是不重复约束,default默认值,
ObjectId是该条数据唯一标识,类似SqlServer的主键,格式类似于GUID。在这里我们发现Image这个字段是一个ObjectId,说明这是一个外部唯一标识,类似于SqlServer的外键。接下来是strict:true,这个意思是必须是我们定义的字段才能存到mongodb中,未经过schema定义的字段是存不进去的。OK,Schema定义好之后,我们给bookSchema定义了一个virtual字段,virtual字段就是虚拟的,意思是在查询返回时,可以在返回结果中包含这个虚拟字段。但是这个字段本身不是mongodb schema中的。
另外上面的toJson和ToObject都是针对这个virtual字段的,如果为false,则不论是返回Json还是Object都不会包含这个virtual字段。
接下来我们给Schema定义了method,saveBookInfo,先将主键值生成,再走save方法,save方法是mongoose提供的,mongoose提供了一系列增删改查的方法,单个批量都支持,非常方便。
最后我们设置collection的名称,并定义model,并将bookModel 模块公开。
好了,到这里,关于Schema的定义就说完了,接下来我们要给客户端页面提供rest api了,先链接mongodb,代码如下
var debug = require('debug')('ChinaBook');
var mongoose = require('mongoose');
initMongoose();
var app = require('../app');
app.set('port', process.env.PORT || 3000);

var server = app.listen(app.get('port'), function() {
    debug('Express server listening on port ' + server.address().port);
});

function initMongoose(){
    mongoose.connect('localhost:27017/ChinaBook',function(err, db){
        if (err) {
            console.log('Unable to connect to the mongoDB server. Error:', err);
        } else {
            console.log('Connection established to', 'localhost:27017/ChinaBook');
        }
    });

}
initMongoose就是连接使用mongoose api 连接mongodb,连接上之后,再进入我们的controller代码bookmng.js。
var bookSchemas = require('../model/bookinfo.js');
var bookMsgRes = require('../framework/message/book_msg.js');
var validator = require('validator');
var mongoose = require('mongoose');

var bookModel = bookSchemas.bookModel;

exports.bookSave = function (req, res) {
    if (validator.isNull(req.body.Title)) {
        res.json(bookMsgRes.buildJsonErrorRes('BookTitleEmpty'));
        return;
    }

    if (!validator.isISBN(req.body.ISBN)) {
        res.json(bookMsgRes.buildJsonErrorRes('ISBNInCorrect'));
        return;
    }

    if (!validator.isFloat(req.body.Price, { min: 0.01, max: 999999 })) {
        res.json(bookMsgRes.buildJsonErrorRes('PriceInCorrect'));
        return;
    }

    if (validator.isNull(req.body.Press)) {
        res.json(bookMsgRes.buildJsonErrorRes('PressEmpty'));
        return;
    }

    if (validator.isNull(req.body.Description)) {
        res.json(bookMsgRes.buildJsonErrorRes('DescriptionEmpty'));
        return;
    }

    var bookEntity = new bookModel(req.body);
    bookEntity.saveBookInfo(function (error, doc) {
        if (error) {
            res.json({ isSuc: false, msg: error.message });
        } else {
            res.json({ isSuc: true });
        }
    });
}
在这里我们引入刚才定义的schema文件,拿到公开的bookModel模块。我们公开一个bookSave方法,参数为req,res,从这个名称我们都能看出这个是http request和http response。方法中先对传入的字段进行验证,验证我们使用的validator扩展包,还是像引mongoose那样去安装。验证不通过,想客户端输出json,注意这里的buildJsonErrorRes,方法如下。
var msg = {
    TitleEmpty: 'Book Title Can\'t be empty!',
    ISBNInCorrect: 'ISBN is incorrect!',
    PriceInCorrect: 'The price is incorrect,it must bwtween 0.1 and 99999!',
    PressEmpty: 'Press can\'t be empty!',
    DescriptionEmpty: 'Description can\'t be empty!'
}

exports.buildJsonErrorRes = function (key) {
    return { isSuc: false, msg: msg[key] };
}

exports.buildJsonSucRes = function (key) {
    return { isSuc: false, msg: msg[key] };
}
这里使用的Validator有很多验证方法

详情请看:https://www.npmjs.com/package/validator
OK,验证通过之后,我们直接将客户端传递的json数据转化成model,在这里只要客户端的字段和服务端schema的一致,就没有问题,你就想反序列化。最后我们调用booModel的saveBookInfo方法,结束。在这里需要注意,如果是post方式提交,则需要用req.body取值,如果是get?xx=xxx,就是req.query,如果是get/:id,则取值就是req.params.id。至此,我们的controller就写完了,那么我们现在将它公开称为rest api。
var router = express.Router();
router.post('/book', bookRoutes.bookSave);
那么在客户端只需要调用/book就可以了。
看一下客户端的页面代码以及js。
#book_typeIn(ng-controller='bookTypeInCtrl')
 label(style='font-size:17px') Book Info:
 hr.panel-line
 form(name='bookForm')
  .row.row-middle-height
   .col-md-12
    .col-md-1
     label Title:
    .col-md-5
     input.form-control(name='title' type='text' maxlength='50' placeholder='Book name' ng-model='Book.Title' required)
    .col-md-6
     p.error-message(ng-show='submitted && bookForm.title.$error.required') Title can't be empty.
  .row.row-margin.row-middle-height
   .col-md-12
    .col-md-1
     label ISBN:
    .col-md-5
     input.form-control(name='ISBN' type='text' ng-model='Book.ISBN' maxlength ='30' required)
    .col-md-6
     p.error-message(ng-show='submitted && bookForm.ISBN.$error.required') ISBN can't be empty.
  .row.row-margin.row-middle-height
   .col-md-12
    .col-md-1
     label Author:
    .col-md-5
     input.form-control(type='text' maxlength ='30' ng-model='Book.Author')
  .row.row-margin.row-middle-height
   .col-md-12
    .col-md-1
     label Price:
    .col-md-5
     input.form-control.tooltip-show(name='price' type='text' maxlength='10' ng-model='Book.Price' data-toggle='tooltip' data-placement='top' ng-pattern='/^[0-9]+(.[0-9]{2})?$/' title='Two decimal places')
    .col-md-6
     p.error-message(ng-show='submitted && bookForm.price.$error.pattern') Price is incorrect.
  .row.row-margin.row-middle-height
   .col-md-12
    .col-md-1
     label Press:
    .col-md-5
     input.form-control(name='press' type='text' maxlength='50' ng-model='Book.Press' required)
    .col-md-6
     p.error-message(ng-show='submitted && bookForm.press.$error.required') Press can't be empty.
  .row.row-margin.row-middle-height
   .col-md-12
    .col-md-1
     label PressDate:
    .col-md-5
     kendo-date-picker(name='pressDate' ng-model='Book.PressDate' k-format='yyyy-MM-dd' onkeydown='return false;' required)
    .col-md-6
     p.error-message(ng-show='submitted && bookForm.pressDate.$error.required') PressDate can't be empty.
  .row.row-margin.row-middle-height
   .col-md-12
    .col-md-1
     label Description:
    .col-md-5
     input.form-control(name='description' type='text' maxlength='200' ng-model='Book.Description' required)
    .col-md-6
     p.error-message(ng-show='submitted && bookForm.description.$error.required') Description can't be empty.
  .row-margin
     button.k-button.k-primary.btn-width-70(type='button' ng-click='bookInfoSave()') Save
     button.k-button.k-primary.btn-width-70(type='button' ng-click='bookInfoReset()' style='margin-left:10px') Reset

 block scripts
  script(type='text/javascript' src='/javascripts/local/book/bookTypeIn.js')
一个很简单的页面,使用了kendo的datepicker控件,angularjs的绑定,用一个book对象绑定,angular数字及非空,正则表达式验证, 很简单,就不多说了,看一下js。
var appModule = angular.module('bookTypeInModule', ["kendo.directives"]);
appModule.config(function ($locationProvider) {
    $locationProvider.html5Mode(true);
});

appModule.controller('bookTypeInCtrl', function ($scope, $http, $location) {
    angular.element('.tooltip-show').tooltip('show');
    Messenger.options = {
        extraClasses: 'messenger-fixed messenger-on-top messenger-on-center',
        theme: 'flat'
    }

    var now = new Date();
    $scope.Book = {};

    $scope.bookInfoSave = function () {
        $scope.submitted = true;
        if (!$scope.bookForm.$valid) {
            return;
        }

        $http({
            method: "post",
            url: "/book",
            headers: { 'Content-Type': 'application/json' },
            data: $scope.Book
        }).success(function (data) {
            if (data.isSuc) {
                $scope.bookInfoReset();
                $scope.showMsg('success', 'Saved successfully!');
            }
            else {
                $scope.showMsg('error', data.msg);
            }
        });
    }

    $scope.bookInfoReset = function () {
        $scope.Book = {};
        $scope.submitted = false;
    }

    $scope.showMsg = function (type, msg) {
        Messenger().post({
            message: msg,
            type: type,
            hideAfter: 2,
            showCloseButton: true
        });
    }

    $scope.onError = function (error) {
        $scope.UploadError = error;
    }
});

angular.element('#book_typeIn').data('$injector', '');
angular.bootstrap(angular.element('#book_typeIn'), ['bookTypeInModule']);
弹出消息我们使用messager,在保存的时候,先检查客户端check有没有通过,通过了,直接将Book对象post到rest api /book,ok,到此,代码就全部完成了。注意最后一句,我们都知道angularjs只有一个启动入口,在这里我每点一个菜单,都会加载一个新页面,所以假如之前的这个页面已经被注入成启动页面,我们再将其设置为启动页面就会报错,所以我们先将该页面注入设置为空,再将该页面设置为启动页面就不会报错。
最后,我们看一下运行结果。

kendo控件还是很好看的,很很多套皮肤,验证效果如下

更多精彩,请看下节分享。唉,软通只给我8k,怎么办,还要继续努力。


 回到顶部
回到顶部
 发表评论
发表评论
 用户评论
用户评论

朝气蓬勃的蛋姐蛋妹
巅峰200人到现在的60人,大家很happy,从无怨言,兢兢业业,工作饱和,任劳任怨

第十届西部物博会9月3日在西安开幕
计划展出面积26000平方米 参展参会单位200多家

正月初一大雁塔人潮涌动
正月初一的大雁塔南北广场,大唐不夜城人山人海

大唐不夜城七彩钢琴路成网红
如果说之前西安打卡最火爆的地方是永兴坊的摔碗酒,那么如今打卡最火爆的头衔要被位于大唐不夜城的“钢琴路”摘取了。

华为CFO孟晚舟被捕 美国“长臂管辖”能伸多长?
原标题:华为CFO孟晚舟被捕,美国“长臂管辖”的“臂”有多长
苹果“降速门”持续发酵 26场诉讼官司同时缠身
如今,因为“降频门“的持续发酵,苹果公司在全球面临着至少二十六起诉讼。

顺丰创始人罕见直面媒体 原来你是这样的王卫
要感谢马化腾(微博)的盛情邀请,给外人多了一次了解王卫的机会。
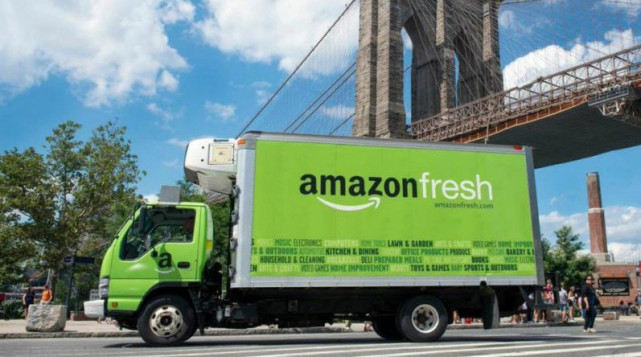
亚马逊有个“生鲜梦” 但收购全食超市还远远不够
如果亚马逊希望革新食品杂货投递,那么其斥资137亿美元收购全食超市(Whole Foods Market)只是这一漫长且烧钱过程的开端。
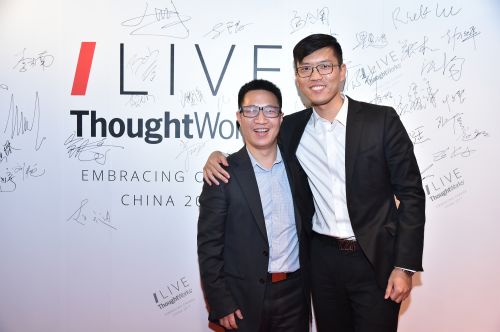
云商智慧物流携手ThoughtWorks 以数字化进击“智慧物流”之路
对于物流行业来说,云计算、大数据和人工智能等技术正在为企业建造数字化物流平台提供必要的技术支撑
- CentOS Solr 集群搭建
- SpringBoot+Redis(Linux集群)+Docker实战
- CentOS Redis集群搭建
- SpringBoot+MyBatis+Mysql实战(一)
- Kendo Angular 大文件上传之断点续传
- Blazor之服务端API Swagger&JWT 认证
- Blazor实战之BootstrapBlazor 增删改查
- VUE实战(二)
- Angular7 QuickStart 之会员管理(充值)
- 阿里云ECS windows Server https配置
- Winform实战之-信息共享系统(二)
- ASP.NET Webforms 之Helo App后台管理
- 终将逝去的VB6
- ASP.NET 即时通讯之SignalR
- Node.js 切近实战(九) 之Excel在线(在线编辑)


 用户反馈
用户反馈